Comment câbler un autoradio à partir de rien ?
Avez-vous déjà voyagé dans une excellente voiture mais avec de la musique de mauvaise qualité ? Malheureusement, cela a été un problème dans la plupart des voitures.
En règle générale, de nombreuses voitures sont équipées d'unités centrales montées en usine qui ne sont pas à la hauteur. En effet, la plupart des constructeurs automobiles ne mettent pas le plus grand effort sur la qualité du son et de l'équipement audio d'une voiture.
La décision la plus courante et la meilleure est alors de remplacer l'unité principale de la voiture par une radio de rechange, mais comment câbler un autoradio à partir de zéro ? Découvrons.
La première étape du câblage d'un autoradio consiste à retirer le faisceau de câbles et à déconnecter les câbles reliant les haut-parleurs et l'alimentation. Ensuite, attachez les fils au nouveau faisceau ou à l'adaptateur de faisceau et branchez-le dans la nouvelle radio. Une fois connecté, testez l'autoradio et s'il fonctionne correctement, placez-le dans le tableau de bord.
L'ensemble du processus de remplacement implique l'installation et le câblage de l'autoradio. Dans cet article, je vais vous montrer un guide étape par étape sur la façon de câbler un autoradio.
Comment câbler l'autoradio à partir de zéro. Un guide complet.
Comme d'autres processus, suivre les instructions appropriées de câblage de la chaîne stéréo garantit que vous disposez d'un son de haute qualité dans votre voiture.
Prenez le temps de lire attentivement chaque étape et agissez en conséquence. Assurez-vous de ne pas travailler à la hâte et accordez beaucoup d'attention au travail.
Quels outils sont nécessaires pour câbler un autoradio ?
Avant de faire quoi que ce soit sur l'autoradio, vous devez avoir préparé quelques outils de base mais nécessaires.
Vous avez probablement tous dans votre garage, mais sinon, j'ai ajouté les liens Amazon vers les outils que j'utilise, et je suis satisfait de la qualité :
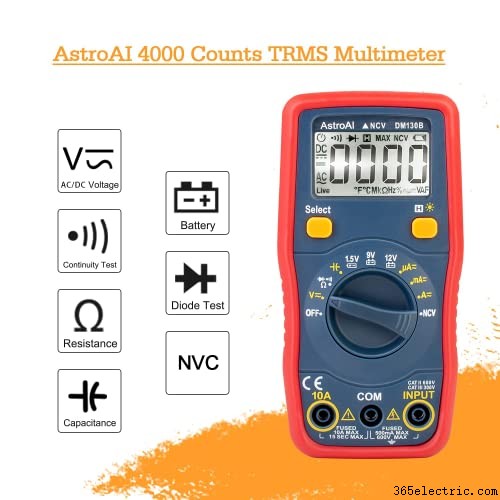
- Multimètre numérique.
- Dénudeurs de fils.
- Crimpers.
- Testeur de piles ou de haut-parleurs de 9 volts
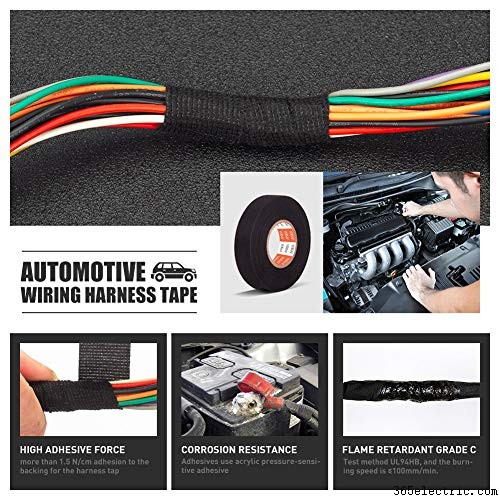
- Ruban électrique.
Étape 1 :retirez la radio et déconnectez le faisceau de câbles
Tout d'abord, retirez l'ancienne chaîne stéréo du tableau de bord et déconnectez le faisceau de câbles. À ce stade, selon la nouvelle radio, vous aurez peut-être besoin d'un adaptateur de câblage pour vous aider à connecter votre nouvel autoradio au clip existant de la voiture.
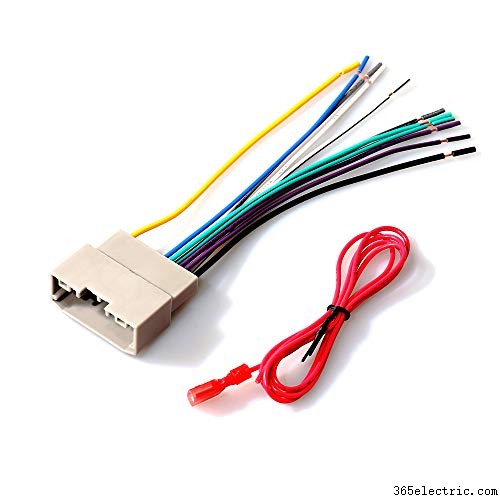
Un adaptateur de câblage permet de connecter des autoradios uniques avec la connexion DIN standard de la voiture et évite toute erreur de connexion.
Étape 2 :Déconnecter la batterie
Lors du processus de câblage, vous devrez travailler sur le système électrique.
Par conséquent, il y a des risques de choc électrique, et c'est pourquoi il est recommandé de débrancher la batterie avant de commencer le processus de connexion du fil.
Dans la plupart des voitures, vous trouverez la batterie sous le capot, avec quelques rares cas lorsqu'elle est installée à l'arrière du véhicule.
Après avoir localisé la batterie, utilisez une clé à main ou à douille pour desserrer le câble noir de la borne négative de votre batterie.
Envisagez de perdre le boulon et tirez le câble vers le bas du côté de la batterie pour vous assurer qu'il ne touche pas les fils positifs. Ne pas débrancher la batterie peut vous blesser ou blesser l'équipement électrique de la voiture.
Étape 3 :Enroulez tous les fils connectés
L'importance de le faire est de sécuriser leurs points de connexion.
Après avoir vérifié tous les fils et les avoir connectés à la voiture, il est essentiel de rendre les connexions permanentes.
Assurez-vous qu'il n'y a pas de fil dénudé dans l'autoradio, et pour déformer les connexions de fil, vous pouvez utiliser du ruban électrique .
Vous pouvez utiliser d'autres méthodes pour enrouler les fils, mais l'utilisation de ruban adhésif est la méthode la plus simple, la moins chère et la plus courante utilisée par de nombreuses personnes.
Étape 3 :Testez votre autoradio
Après avoir effectué les connexions et les avoir sécurisées, vous devez reconnecter la batterie pour pouvoir tester la chaîne stéréo avant de la placer définitivement dans le tableau de bord.
It is advisable to install the car radio after checking it is working perfectly. First, however, you need to check its all functions, including speakers connections.
Finding something that is working incorrectly means the wires are not connected right, and often mistake is wrong connection of the speaker wires.
Step 4:Place the Wires Harness Into the Dashboard
After ensuring that all of your connections are tight and secure, it’s now time to install wiring inside the dash.
This includes connecting an often-forgotten antenna wire from car radio signal reception equipment so you can enjoy clear communications while driving!
You have to remember that there should be enough space for your radio in the dashboard, so make sure all wires are pushed into the dashboard.
This way, the stereo won’t get stuck when trying to move or remove from its position later on without damaging anything!
Step 5:Place the Car Radio Into Its Place
In most cars, there is an opening inside the dash where the car radio should be placed.
While installing the car radio, make sure it perfectly fits into the slot, and there are no extra wires that would block free movement.
If you feel some resistance while pushing the radio, never force it with too much pressure to its position. Otherwise, you can damage the wiring connectors at the backside.
In this case, an adaptor is very helpful at sliding the car radio properly in its correct position. An adaptor is available at any electronic store or auto parts store.
Step 6:Secure the Car Radio in Its Position
You can secure a car radio into two main methods.
- One of them is for the car radios that need spring clips. Once the stereo is locked at the correct position, the clips close and you can hear a click sound.
- The other one that is less common, involves brackets and bolts that need proper fixation. Bolting the radio permanently helps to secure it in the place.
Step 7:Install Dashboard
This is the final step of the wiring process and involves assembling every piece of the trim and the plastic clips.
At the same time, be careful to avoid the damage of any plastic parts and take time to check if the overlapped pieces have been correctly layered.
If you come across some plastic parts that have been broken, you can use hot glue to secure them.
However, using glue is not highly recommended since the plastic parts you fix can become difficult to remove in the future.
If the entire rim piece has been broken completely, the only option you have is to buy a replacement.
How to Test Car Radio Wire for Their Right Connections
All wires have to be in good condition and connected to the radio without interruptions.
Below I listed a few simple checks you can do to make sure the stereo’s connection is correct:
Constant wire
This wire comes with 12 volts, and it supplies power directly from the battery.
To test if it is working, the first thing you should do is put off your ignition. Afterward, ground the black wire, pick up the red meter probe and connector, and touch it with the constant yellow wire.
The constant wire should give the reading up to 12 volts with a 0.5V difference.
Speaker wire
The simplest way to test the speaker wires is to use a 9-volt battery. You can also use a multimeter to test the speakers but make sure you set it to resistance before testing.
Accessory Power
Turning off the ignition makes the wire show a zero volt reading at a meter. Upon turning it on, it reads 12 volts and 0.5 volts.
Ground wire
Identifying the ground wire is straightforward after identifying the constant wire. Then, after proper testing, the ground wire is connected to the black wire.
Note that it is necessary to begin attaching a red meter probe with constant wire and later a black meter probe with the wire you are testing.
If the reading on the meter is similar to the constant wire testing, that is the ground wire.
Frequently Asked Questions (FAQs)
Where Is the Ignition Wire Located?
Depending on the car, the ignition switch harness is located inside the steering wheel column on either the left or right side.
The ACC wire is the one often 18 gauge yellow or pink. Installing this wire at a local electrical specialist can help you ensure the installation.
What Happens if You Do Not Ground a Car Stereo?
It is impossible to operate a car stereo without a proper ground wire installed.
The correct ground connection allows your radio to work perfectly without malfunctioning issues when the car is on.
How Can I Tap the Wires When Wiring a Car Stereo Without the Harness Clip?
The best solution is to look at your car’s electrical manual. However, if the manual is unavailable, you have to trace every wire.
Using a multimeter will be a good idea in this task. Since car electrical systems can be tricky to manage, do not attempt to play with the car’s electrical system without basic knowledge.
Conclusion
You have no reason to stay in an excellent car with a poor music system with the above guides.
Remember, adding a new car radio in your car is a great way to breathe new life into your vehicle. However, for the stereo to work at its own best, you have to follow the installation and wiring process.