Conseils pour Nexus 9 :les 9 premières choses à faire
Si vous êtes l'un des nombreux qui se sont précipités pour acheter un Nexus 9 dès qu'il est apparu sur le Google Play Store ou dans votre point de vente local, alors vous êtes peut-être aux genoux dans Android 5.0 Lollipop et vous ne savez même pas qu'il devient encore meilleur qu'il ne l'est actuellement. Tout ce que vous avez à faire est de modifier quelques éléments pour rendre le Nexus 9 en cours d'exécution Android encore meilleur. Voici nos conseils essentiels sur la Nexus 9 qui devraient être les toutes premières choses que vous devez faire lorsque vous la sortez de la boîte.
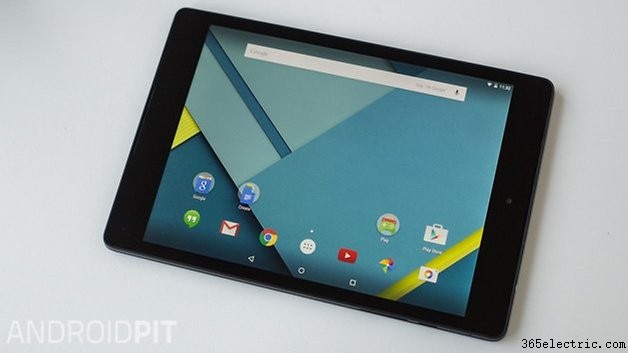
- Test de la Nexus 9
Utiliser Tap &Go
Si vous avez un appareil Android avec NFC et Bluetooth, c'est-à-dire à peu près tous, vous devriez vraiment utiliser la fonction Tap &Go lorsque vous configurez votre Nexus 9 pour la première fois. Lors de la première configuration de la configuration, vous arriverez sur l'écran Tap &Go.
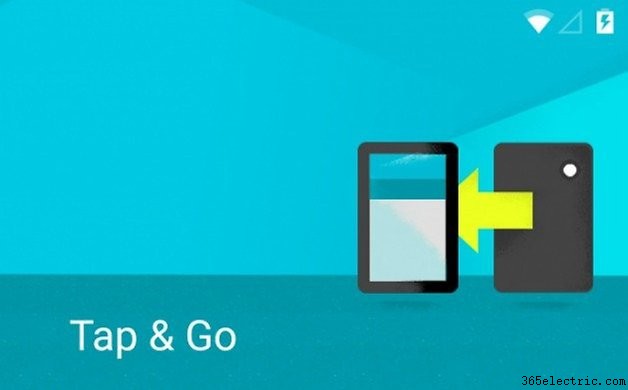
Prenez votre autre appareil (avec NFC et Bluetooth activés) et appuyez sur les deux ensemble. Vous entendrez le son d'appairage NFC et le transfert Bluetooth de toutes vos applications, comptes et données commencera leur migration vers votre nouvelle tablette. C'est rapide, facile et vraiment génial.
Configurer l'économiseur de batterie Nexus 9
L'une des plus grandes fonctionnalités d'Android 5.0 est le nouveau mode Stock Battery Saver. Bien sûr, ce genre de chose a été sur tous les autres produits phares OEM cette année, mais ce n'était pas une fonctionnalité d'Android de série auparavant.
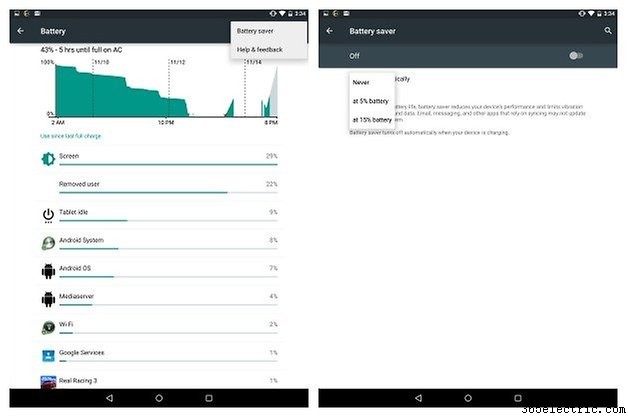
Dirigez-vous vers Paramètres> Batterie et appuyez sur ce petit bouton de menu de débordement dans le coin supérieur droit et activez l'économiseur de batterie. Vous pouvez alors choisir entre l'activer à 15% ou 5% restants. Croyez-moi, l'effet de l'économiseur de batterie lorsque vous manquez de jus en fait un élément essentiel.
- Autonomie de la batterie d'Android 5.0 :tout ce que vous devez savoir
Redirigez votre e-mail vers Gmail (et abandonnez l'application morte)
Cela semble super bizarre, mais Google a décidé de conserver l'ancienne application de messagerie sur le Nexus 9, mais lorsque vous l'ouvrez, un écran de démarrage vous indique qu'il vit désormais sous l'œil vigilant de l'application Gmail. Donc, en gros, c'est une icône creuse qui prend de la place dans le tiroir de votre application sans raison. Lancez donc ''l'application'' et cochez la petite case qui vous redirige vers Gmail au cas où dans un moment d'oubli vous appuyez accidentellement sur l'icône Email au lieu de l'icône Gmail.
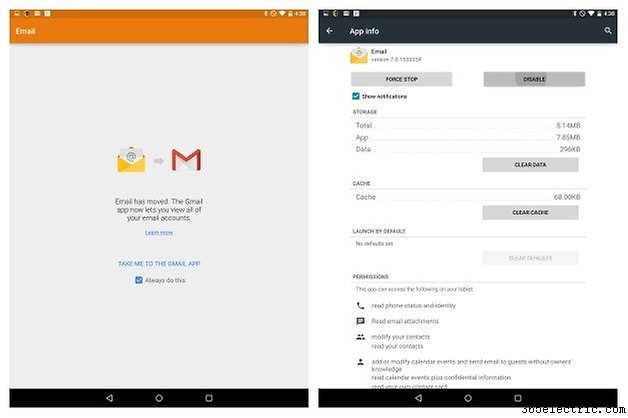
Mais ensuite, vous voulez également vous débarrasser de l'application creuse. Allez donc dans Paramètres> Applications et recherchez E-mail dans l'onglet Tous. Allez-y et désactivez-le. It will now disappear from your app drawer but any Exchange or Yahoo, Outlook etc accounts that you have will still be redirected to the Gmail app via Exchange Services. The Email app will now live in limbo on the Disabled tab in Apps if you ever decide you want a useless app icon in your app drawer in the future.
- Android Lollipop vs Android KitKat
Familiarize yourself Interruptions and Priorities
When you first hit the volume button on your Nexus 9 you may notice there's some additional information there. ''None,'' ''Priority'' and ''All'' now appear underneath the volume slider. These are your Interruptions settings, which you can also access through Settings> Sound &Notification> Interruptions.
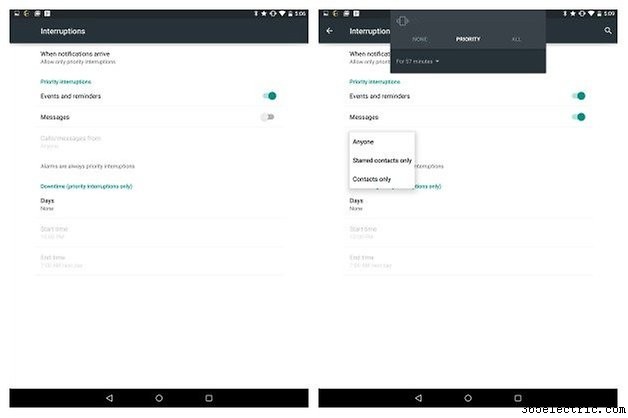
This setting lets you set up rules for what you consider to be priority interruptions as well as the days and times during which you want to be notified of them. So, for example, you can set Events &Reminders as priority notifications during work hours and perhaps phone calls and messages from your family only as well. Alarms are always priority notifications, so don't fret.
- Best Android 5.0 Lollipop features
Take control of Chrome
Fortunately, the Nexus 9 doesn't suffer from the same irritating default Chrome setting that the Nexus 5 does, where Chrome tabs are accessible through the Recent Apps list rather than through the in-app tab switcher. If you use other apps in between Chrome windows, your Chrome tabs will be separated in the Recents list.
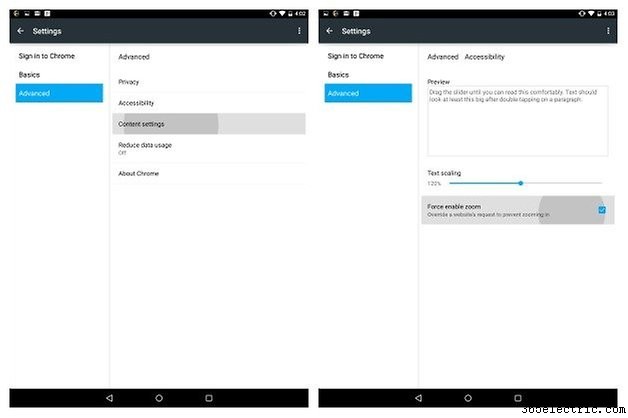
Fortunately you can change this in Chrome's settings, but the Nexus 9 has the traditional tab view. However, head to Chrome Settings anyway and go to the Advanced tab. Check the box for ''Force enable zoom'' to override website's that don't automatically let you zoom in, and set yourself a comfortable font size for when you double tap a paragraph in Chrome.
- Everything you need to know about Android 5.0 Lollipop
Get yourself a better music player
I mean, seriously. No offense Google, but I don't trust you to give me the best out of my sexy new BoomSound stereo-front-facing speakers. Sure, they’re bassy and loud but I want to tweak the living daylights out of them to get exactly the audio experience I want.
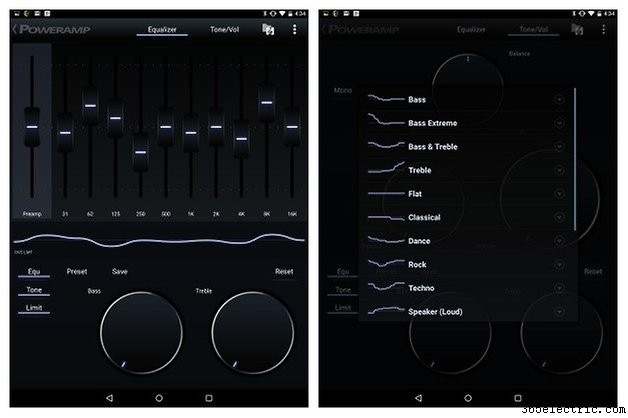
So head to the Play Store and grab an app with a great EQ like Poweramp. There's a free trial version but you'd do well to dig deep and fork out the couple of bucks it costs to get the full version because with speakers like this, you want them sounding their absolute best. BoomSound all the things!
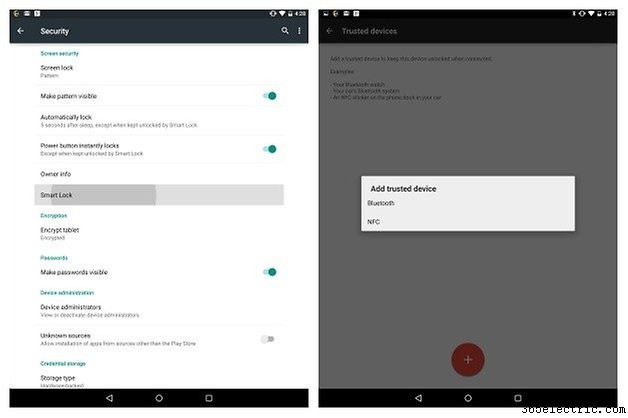
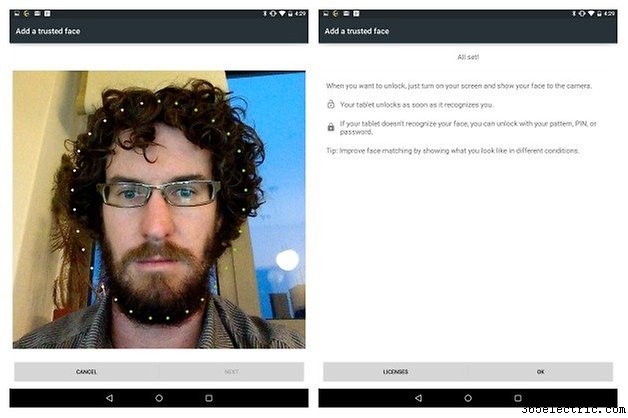
Set up Smart Lock
You're on the front foot of Android with the Nexus 9. One of the coolest features of Android 5.0 Lollipop is easily Trusted Devices, or personal unlocking if you prefer. Once you have a lock screen security set up, you will have access to the previously grayed out Smart lock section in Security.
- Android 5.0 security:everything you need to know
From here you can set your lovely mug as a Trusted Face or your smartwatch, an NFC badge or any other Bluetooth device as a Trusted Device, meaning that when you're in the vicinity of that Trusted Device you can bypass your lock screen security entirely. Once your Trusted Device is out of range, your lock screen security kicks back in. It's simple, brilliant and the future of mobile security.
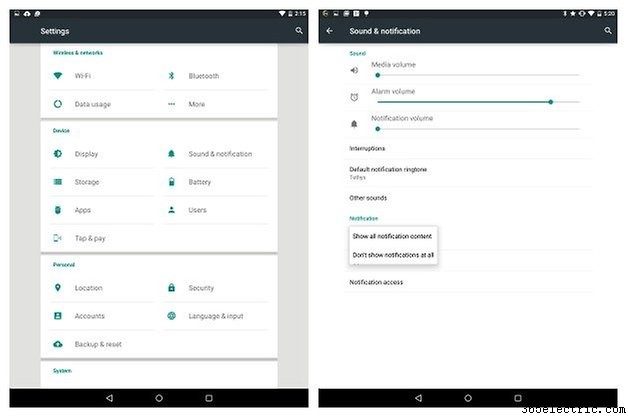
Set your lock screen notifications
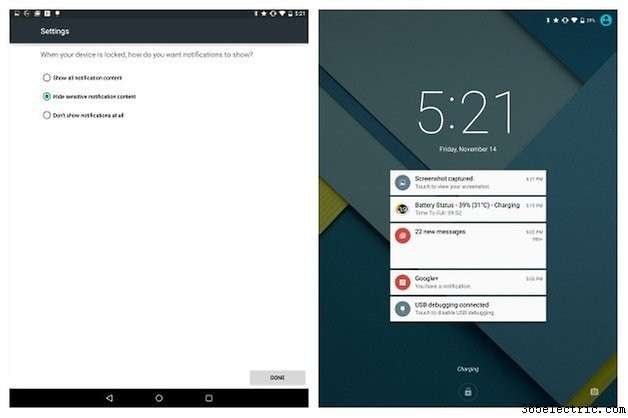
When you use swipe to unlock as your unlock method you only have two options for lock screen notification visibility:show all notifications or none at all (accessible in Settings> Sound &Notification> ''When device is locked''). Once you set up a more secure lock screen security option though, that expands to include another option:hide sensitive notification content.
This means that while you'll still be able to see that emails etc have arrived, you won't be able to swipe down to preview their contents on the lock screen unless you first enter your lock screen security method. While it's kinda cool to be able to see everything right there on the lock screen, perhaps you don't want just anyone that picks your Nexus 9 up to be able to see the same things.
Double tap to wake
Don't forget that the Nexus 9 supports double tap to wake! Quite possibly the greatest software feature to grace Android in the past year. When your screen is off, simply double tap it to wake it from sleep! If you install an alternate launcher like Nova Launcher, you can then turn it off again by double tapping in the status bar up top (accessible via Nova's settings).
What are your thoughts on the Nexus 9 so far? What's your favorite part of Android 5.0?