Comment configurer un patchbay dans un studio
Qu'est-ce qu'un patchbay ?
Un patchbay agit comme un concentrateur pour connecter tous les composants de votre studio, y compris les microphones, les préamplis, les effets externes, les mélangeurs, les écouteurs ou toute source ou destination audio de votre système.
Avant d'avoir une patchbay, je déconnectais et reconnectais constamment les câbles des entrées et sorties de mon équipement. Mais maintenant, je peux tout laisser connecté au patchbay et utiliser simplement un câble de raccordement pour effectuer des connexions personnalisées selon les besoins. Cela me fait gagner beaucoup de temps de configuration, évite les erreurs de patch qui coûtent encore plus de temps et protège également mon équipement et mes câbles de l'usure constante.
À l'arrière de ce patchbay TRS ¼", vous trouverez 24 prises d'entrée sur la rangée supérieure et 24 prises de sortie sur la partie inférieure. Ces 48 prises à l'arrière correspondent aux 48 prises à l'avant de la patchbay. Ainsi, vous pouvez garder tout votre équipement branché sur les prises à l'arrière et configurer des flux de signaux personnalisés en connectant les prises avant avec des câbles de raccordement.

Comment configurer une baie de brassage
Lors de la configuration de votre patchbay, il est important de penser au flux de signal général de votre studio. De cette façon, vous pouvez disposer votre patchbay de manière à ce que les fonctions de base de votre studio soient configurées par défaut, sans avoir besoin de câbles de patch. Ceci est possible grâce à une fonctionnalité intégrée à la plupart des patchbays audio, appelée normalisation.
Considérez chaque paire verticale de prises sur votre patchbay comme un module. Il existe trois modes généraux et le mode que vous choisissez déterminera le fonctionnement de ce module.
Mode traversant
Le premier mode, et le plus basique, est le mode "Thru". Cela signifie que le jack supérieur à l'arrière coulera simplement vers le jack supérieur à l'avant et que le jack inférieur à l'avant coulera simplement vers la rangée inférieure à l'arrière. Dans ce mode, les prises du haut et du bas fonctionnent indépendamment.

Semi-normalisé
Le deuxième mode est appelé semi-normal. En mode semi-normal, les prises à l'arrière correspondent toujours aux prises à l'avant (tout comme en mode "Thru"), mais le signal de la prise du haut descendra automatiquement vers la prise du bas par défaut lorsqu'il n'y a pas de câble de raccordement est connecté. En mode semi-normalisé, cette connexion par défaut est interrompue lorsque vous connectez quelque chose à la prise inférieure du panneau avant. En d'autres termes, la prise de sortie en haut se dirige vers la prise d'entrée en bas à moins que quelque chose d'autre ne soit connecté à cette prise d'entrée.

Normal
Le troisième mode est appelé full-normal. In full-normal mode, the default connection from top to bottom will be broken when a cable is connected to either the top or the bottom jack on the front panel. So, connecting a patch cable to the output or the input jack will break the default connection.

Patchbay Layout
There are lots of uses for each of these modes and the possibilities are endless, but here are some examples of how I have set up my patchbay to meet the needs of the various devices in my studio.

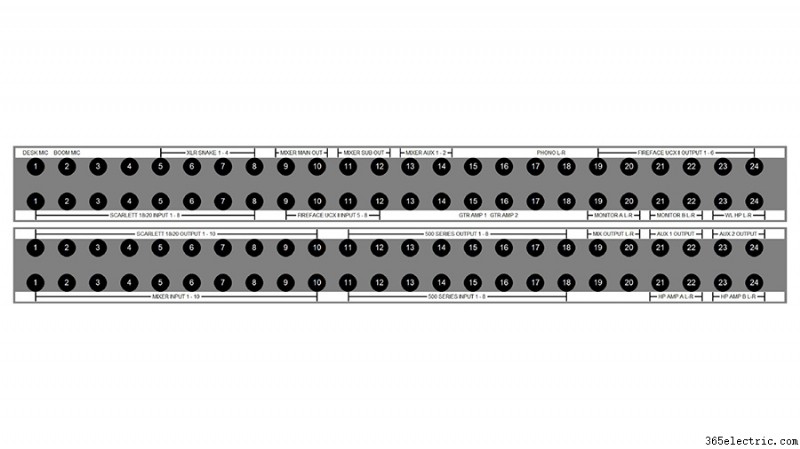
The top left corner of my patchbay is where my microphones come in. Some of my microphones (like this boom mic) are directly wired into the top row of jacks on the back of my patchbay. Alternatively, I could have an XLR panel in the back of the room that connects to the top row of jacks on the back of the patchbay. That way, I could connect a microphone to that XLR panel which would then be available on the top row of my patchbay.
I will almost always want my microphones to connect to the microphone preamps on my audio interface, so I’ve set these jacks up in full-normal mode. This means the mics will be connected to my interface by default without any patching. But if I want to patch the microphone to a different mic preamp I can simply do so with a patch cable.
I chose to use full-normal instead of half-normal, because I don’t want to accidentally connect my microphone to two preamps that are both supplying phantom power. When I connect a patch cable to the top jack, it automatically breaks the connection to my interface. This also prevents me from connecting two microphones to the same audio interface preamp.
The other essential connections for my typical workflow are set up using half-normal mode. For example, my interface outputs flow directly to the input of my monitors. If I want to patch my turntable directly into my monitors for a pure analog connection, I can patch from my phono output jacks to the monitor input jacks and bypass the other components of the system. Given that this is set up in half-normal mode, the default connection from the interface outputs will be broken when I connect to the monitor input jacks.
Half-normal jacks also provide a way to split a signal. Let’s say I want to send my interface output to the input of my monitors while also sending that output to my wireless headphones. I just patch the output of my interface to the input of my wireless headphone transmitter and the signal still flows down to the speakers, because nothing is connected to the bottom jack. Remember – in half-normal mode, the connection is only broken when there is a plug in the bottom jack.
I use ‘Thru’ mode for my outboard effects and preamps because I don’t want the outputs of my compressor or outboard preamps to feed into their own inputs and create a feedback loop. Setting these modules to ‘Thru’ mode keeps the top jack and bottom jack independent from one another, meaning I need to manually patch these devices anytime I want to use them.
Which Patchbay Should You Use?
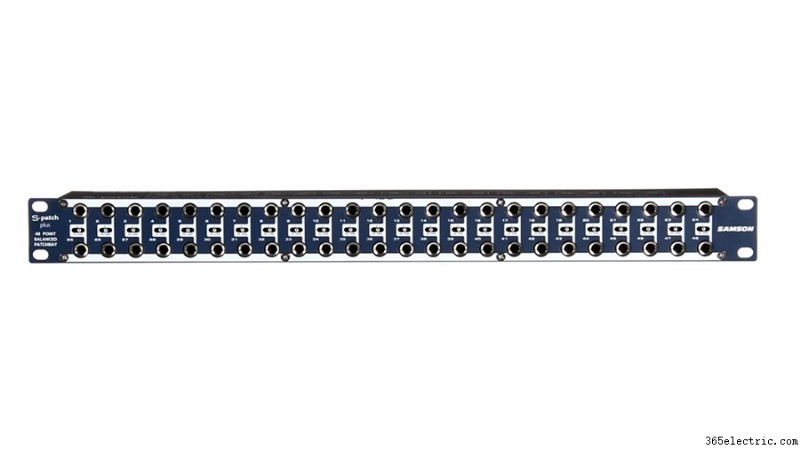
I have two 48-point ¼-inch TRS patchbays. One is a Neutrik, which costs about $100. The other is a Samson S-Patch Plus, which is a little more expensive. I’ve had some time to compare these two options and I think the Samson is well worth the extra money.
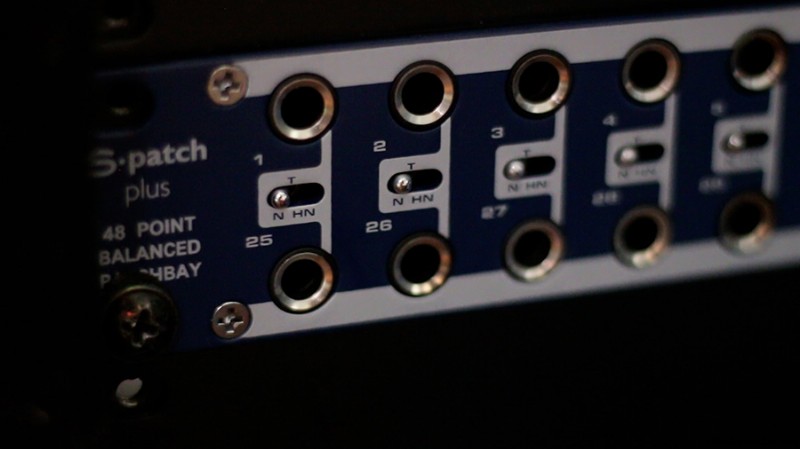
If I want to change the mode on any module in the Samson S-Patch Plus, I just need to toggle the switch between the top and bottom jack.

In order to switch the mode on one of the Neutrik modules, I need to disconnect the jacks from the front and back, remove the front panel of the entire patchbay, take the module out, flip it around, and reassemble everything.
This has caused me a few headaches as I have continued to add components and shift things around on the patchbays, so I would definitely recommend going with the Samson S-Patch Plus if you’re on the fence.
You should also consider how much space you have and how many connections you’ll need. These two 48-port patchbays take up 1RU of rack space each, which can really add up…
If you’ve got a larger collection of components or less rack space to work with, you may want to look into a TT (or tiny telephone connector) patchbay instead. These will be more space efficient, as the density of connection points is much greater with these smaller connectors.
You will also find patchbays that have multi-channel connectors in the rear rather than the same connection type on front and back. This can make for a cleaner setup, utilizing multi-channel fanouts rather than an individual cable on the rear panel for each connection.
