Remplacement de l'actionneur de porte Honda Accord 2008-2012
Dans cet article : Nous vous guiderons à travers les étapes nécessaires pour remplacer un actionneur de porte défectueux sur une Honda Accord de 2008 à 2012.
- Outils requis
- Pièces requises
- Étape 1 :Retrait de votre panneau de porte
- Étape 2 :Retrait de votre actionneur de porte cassé
- Étape 3 :Préparation de votre nouvel actionneur de porte
- Étape 4 :Réinstallation de votre actionneur et du panneau de porte
Difficulté du projet :Facile
Temps estimé :1,5 heure (ou moins)
L'actionneur de la porte côté conducteur de ma Honda Accord 2009 a commencé à faire du bruit il y a environ 6 mois lors du verrouillage et du déverrouillage. C'était particulièrement visible lorsque les portes étaient fermées et que la voiture commençait à rouler en marche – le verrouillage automatique. Cela ressemblait un peu à un gémissement (faute d'un meilleur terme).
Enfin, il y a environ deux semaines, il a cessé de répondre au verrouillage et au déverrouillage par intermittence. J'ai remarqué que chaque fois que je m'éloignais d'un feu stop, il essayait de se verrouiller - feu stop après feu stop. J'ai réalisé que la porte côté conducteur ne se verrouillait pas et que la fonction de verrouillage automatique essayait de la verrouiller à chaque fois que la voiture commençait à rouler. C'était ma file d'attente pour le remplacer.
Dans cet article, je vais vous guider à travers les étapes pour retirer votre panneau de porte et remplacer l'actionneur de porte de votre Honda. C'est assez simple en fait. N'oubliez pas :pour de bonnes pratiques et une conservation en toute sécurité, n'oubliez pas de débrancher le côté négatif de la batterie de votre véhicule avant tout travail électrique afin d'éviter que des fusibles sautent ou des dommages électriques à votre voiture !
Pièces requises
Il n'y a vraiment qu'une seule partie (ou deux si vous faites deux portes) :
- Actionneur côté conducteur pour Honda Accord 2008-2012 - 37 $
- Actionneur côté passager pour Honda Accord 2008-2012 - 32 $
Outils requis
Ce projet était assez direct et simple et ne nécessitait que quelques outils :
- Tournevis cruciforme
- Tournevis à tête plate
- Clé ou douille et cliquet de 10 mm
- Outil de levier en plastique
- Super colle
- Ruban adhésif
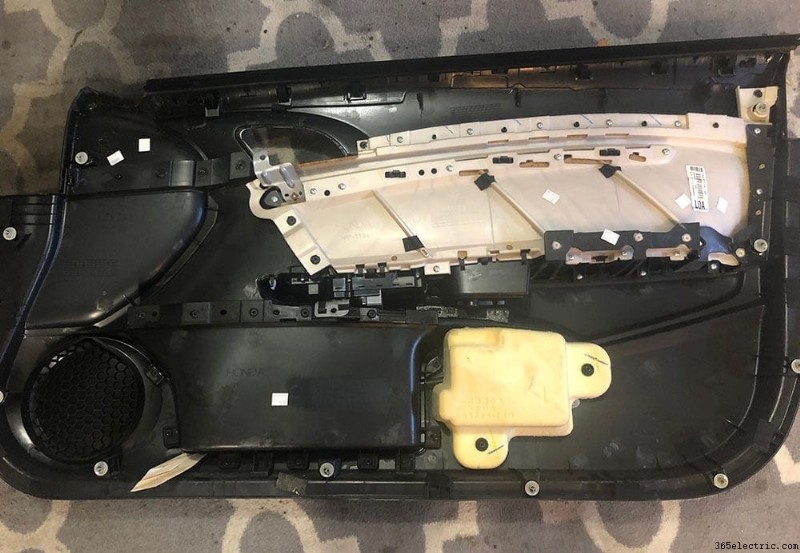
Étape 1 :Retrait de votre panneau de porte
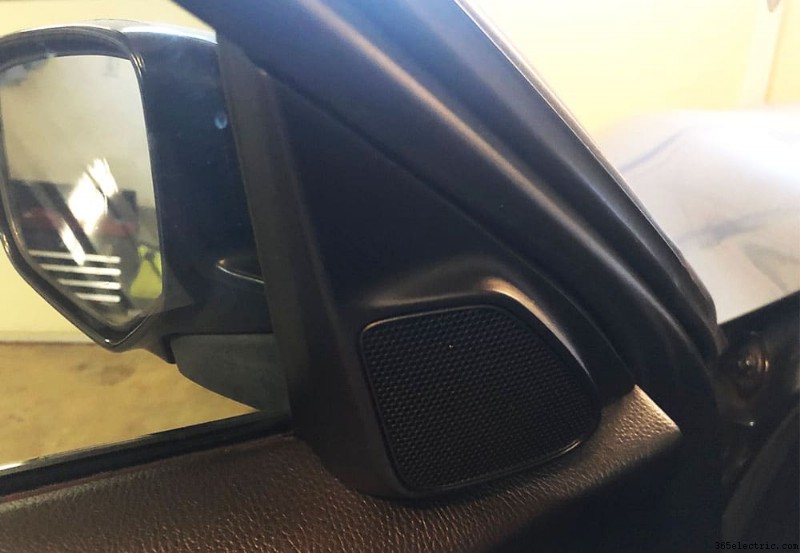
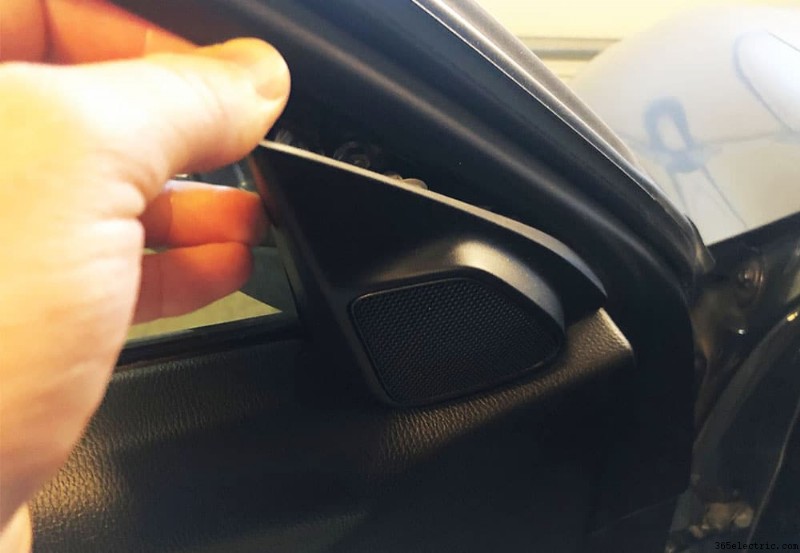
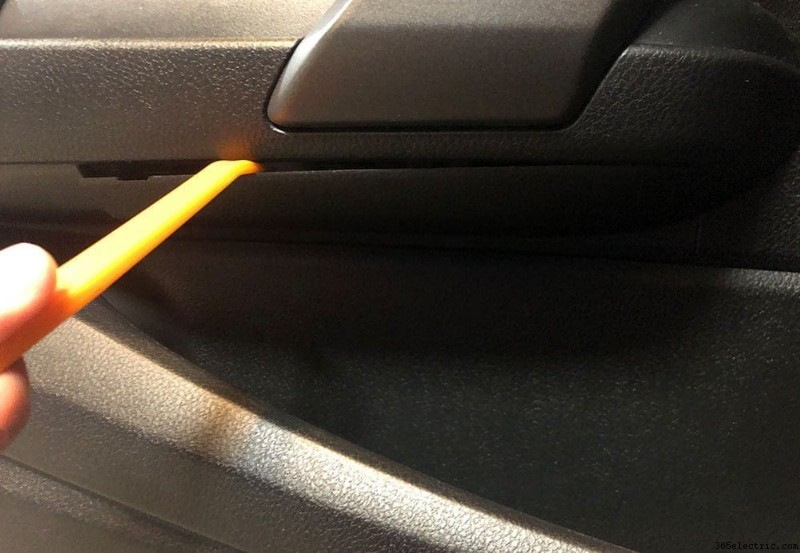
La première chose que vous devez faire est de retirer les vis de votre panneau de porte et de déclipser et de retirer les panneaux de porte de votre Accord. Pour ce faire, commencez par le tweeter sur le côté supérieur de la porte. Placez vos doigts entre la fenêtre et le panneau du tweeter et tirez doucement. Il y a un seul clip derrière, donc il se déclipse avec une relative facilité. Une fois déclipsé, retirez la fiche du tweeter unique et placez le tweeter de côté.
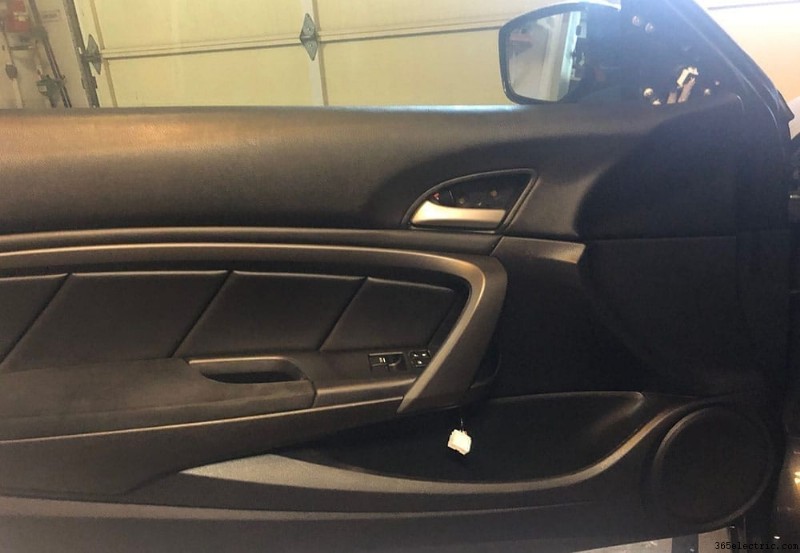

Avec votre tweeter retiré, descendez jusqu'à la poignée de porte. Derrière la poignée de porte, il y a un couvercle de garniture qui couvre trois vis. Sur le dessus du couvercle en plastique, vous remarquerez un petit clip. Utilisez un petit tournevis à tête plate pour enfoncer le clip et retirer le panneau pour exposer les trois vis de la porte. Dévissez les trois vis et placez-les de côté pour réinstaller la porte.
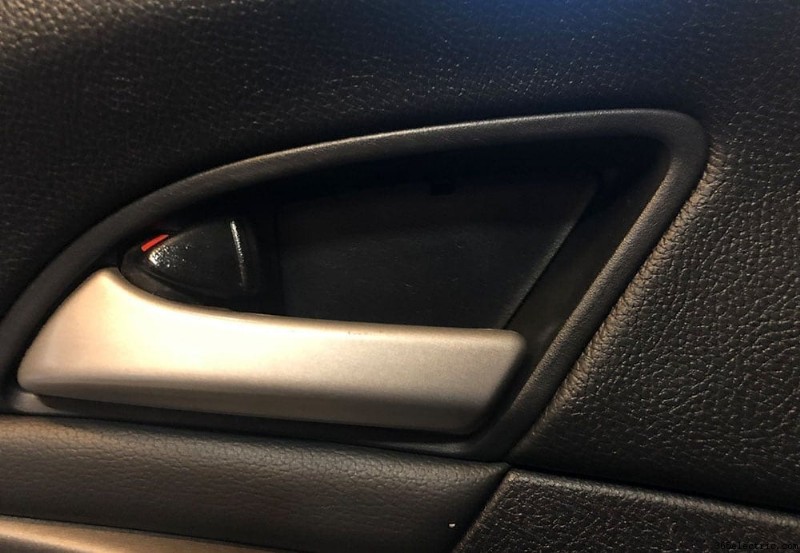
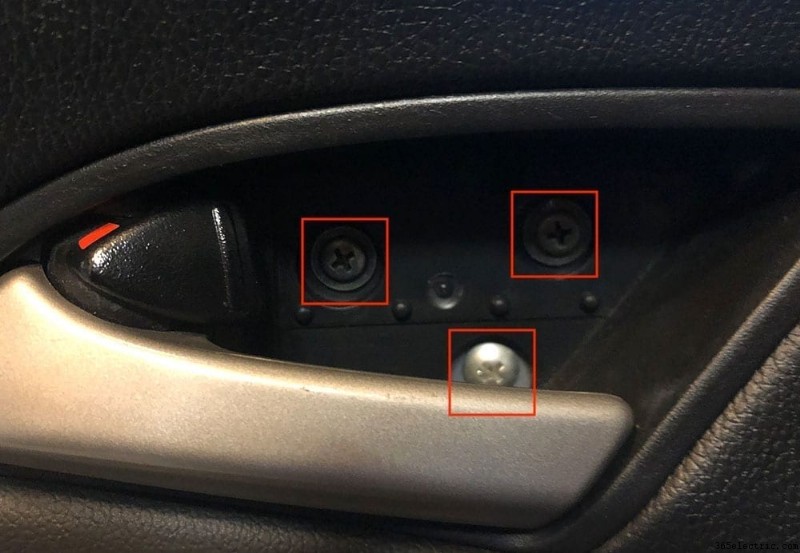
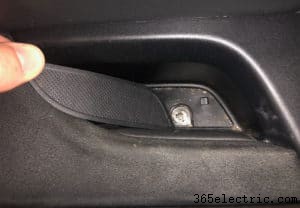
Sur l'accoudoir et la poignée de la porte, il y a une autre vis à retirer. La vis se trouve sous un couvercle en caoutchouc qui est placé au bas de la zone de la poignée de porte. Utilisez une tête plate pour vous caler entre les coins et soulevez le couvercle pour accéder à la vis en dessous. Ensuite, dévissez cette vis de panneau de porte unique.
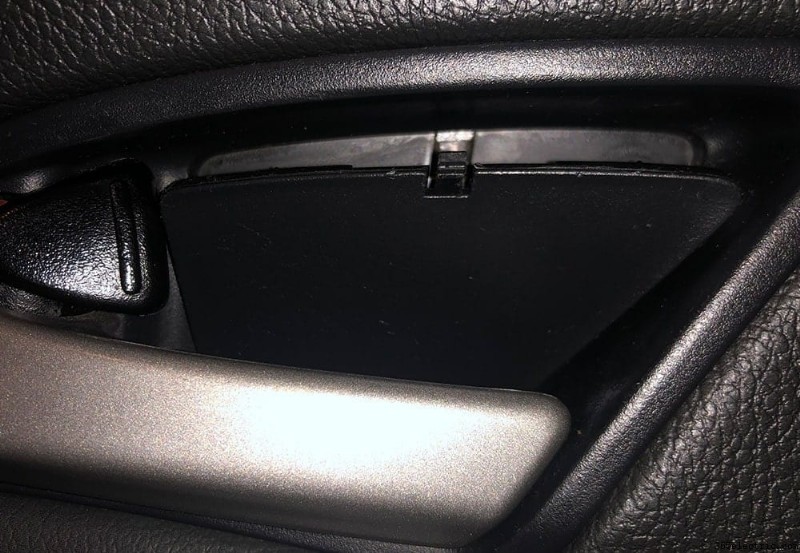
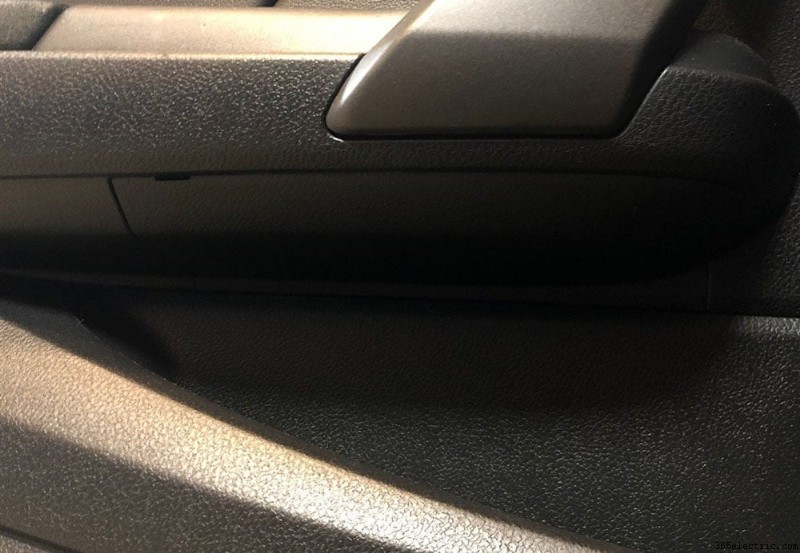
La dernière vis que vous devrez retirer se trouve derrière un panneau sous la poignée de porte. À l'aide d'un outil en coin, soulevez le panneau vers le bas pour le retirer et accéder à la vis située derrière. Dévissez la dernière vis et mettez-la de côté. Ensuite, déclipsez les bouchons blancs et gris du panneau de porte et poussez-les derrière le panneau dans la porte. Cela permettra à votre porte de bouger librement lorsque vous retirerez le panneau de la porte.

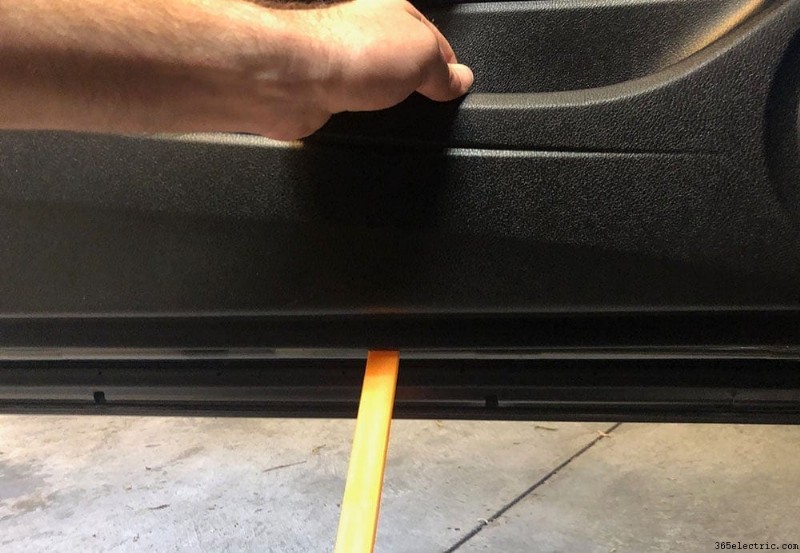
Avec toutes vos vis, tweeter et prises de commutateur retirées, vous êtes prêt à dégager le panneau et à le retirer de votre porte. Pour ce faire, calez un grand levier sur le côté inférieur du panneau. Si vous n'avez pas d'outil de levier assez grand, il y a en fait un espace dans lequel vos doigts pourront s'insérer le long du côté inférieur du panneau.
Pulling from the very bottom side of the panel and from the cubby area, pull the door panel outwards away from the door to unclip all of the bottom door clips. Typically this will be a loud and abrupt ‘POP' and the bottom side of the panel will break free. There are clips along side the entire bottom of the panel and one or two on the side.
Once all of the clips are free, lift upwards on your door panel to remove it. Once it's lifted away from the door the last piece you'll need to pull free from the panel is the handle. There's a few plastic clips on the back side of the handle that you'll just need to lift upwards to break the handle free and detach it from the door panel.
Place it on a rug or towel to prevent any scratching of the surface.
Step 2:Removing Your Broken Door Actuator
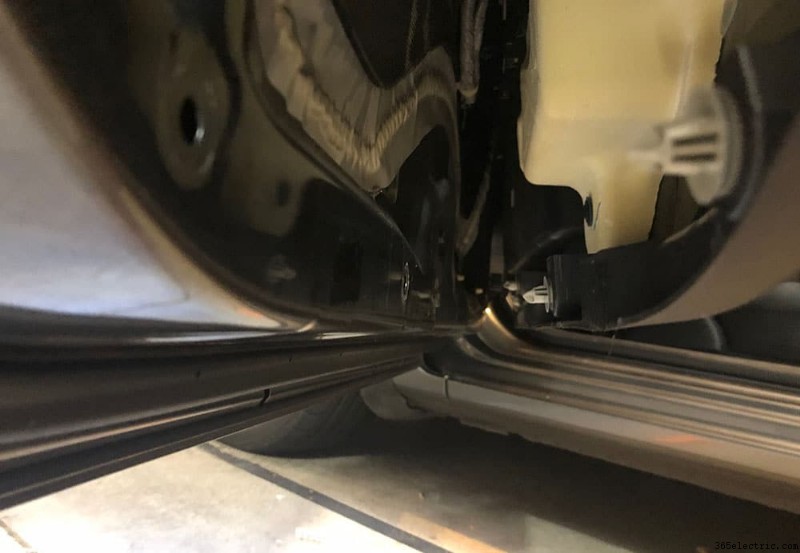
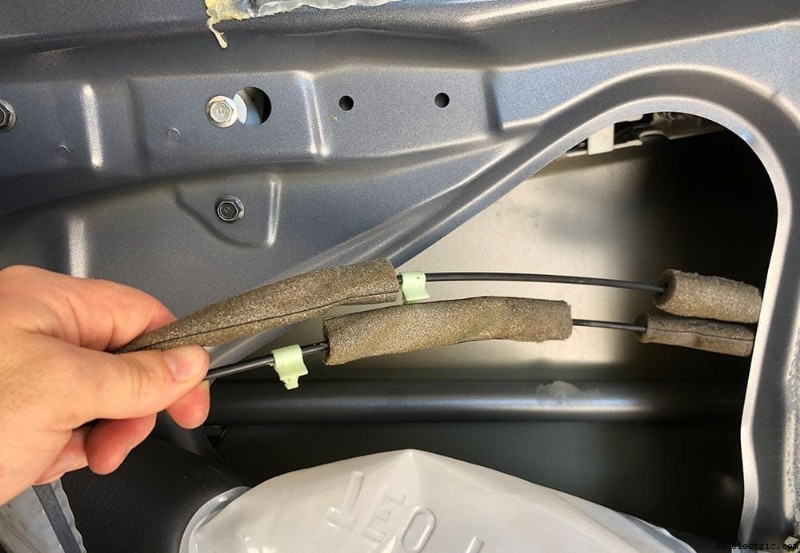
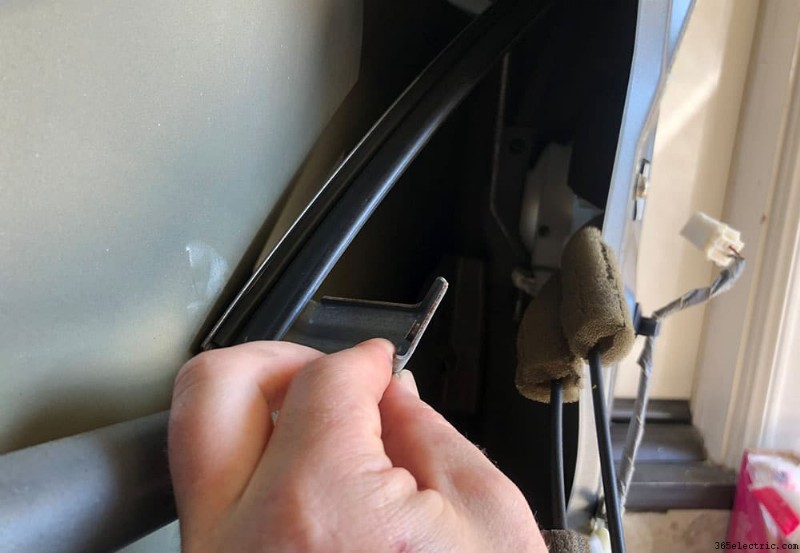
With your door panel removed, you now will be able to gain access to the back side of the door and ultimately the actuator. To begin, you'll need to get behind the damping material that covers the opening of the door panel so that you can reach and access the cable and actuator rod. You can do this by running a razor blade along the adhesive that holds the damping material to the door and peel the material back a foot or two – enough to reach the actuator. In my case I cut a sizable slit in the center to try to limit the damage to the damping.
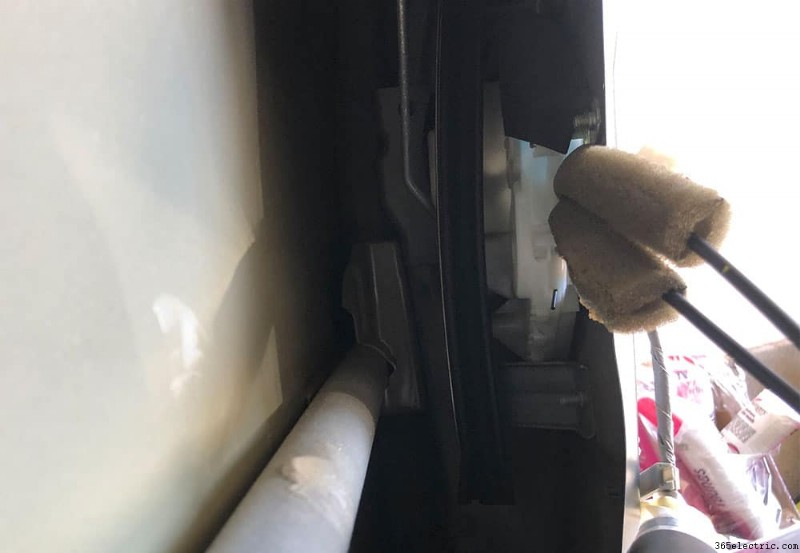
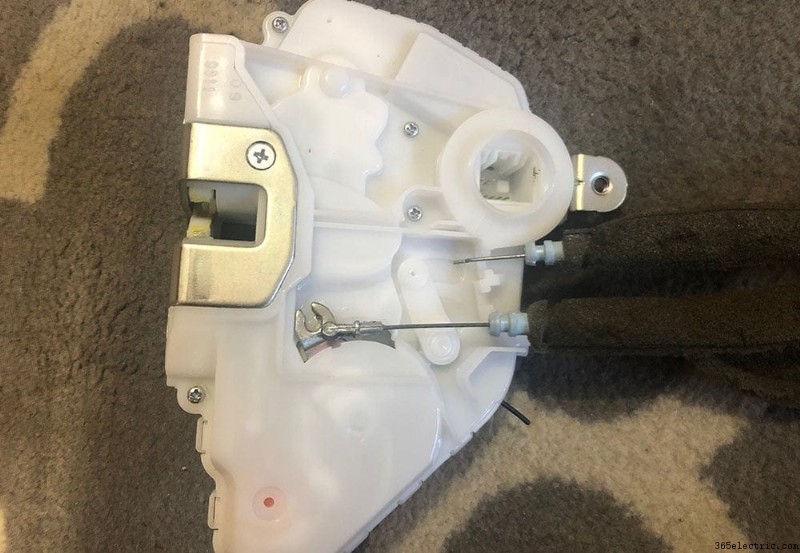
Next, you'll need to unclip the door latch cable that runs along the door and into the back side of the actuator. Once unclipped you can either feed the cables and latch through the damping material or you can leave it hanging for now until you remove the actuator.
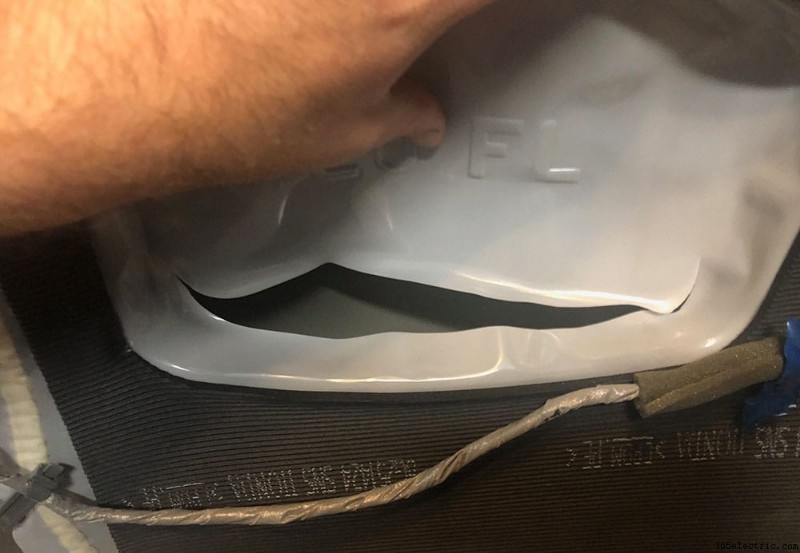
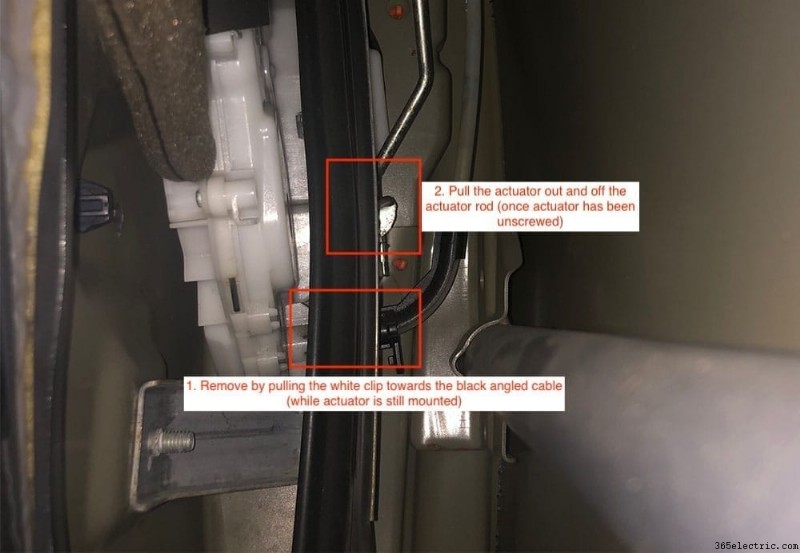
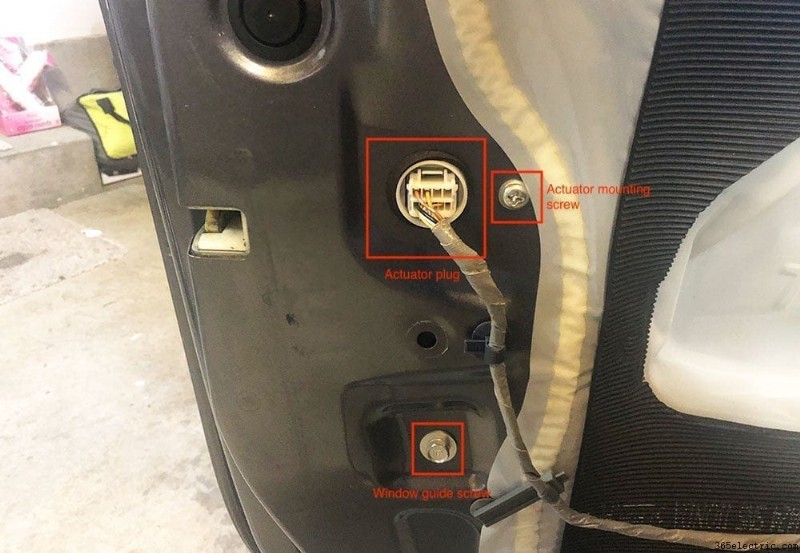
Using the slit in the damping to access the actuator, for those who are replacing the driver side actuator you'll need to remove a single cable that feeds directly into the back side of the actuator (*note this single cable that goes to the back-side of the actuator is only located on the driver side door actuator) . To do this, you need to grasp the white clip that surrounds the black cable housing and pull it away from the actuator to get it to unclip. Once it's unclipped you can remove the cable from the actuator itself (see images). Finally, pull out the plug that powers the actuator.
With the cables unhooked from the door and the single cable removed from the back side of the actuator you're ready to unmount the actuator from the door. There are a total of 4 phillips screws that hold the actuator to the door. Remove all 4 screws along with the 10mm bolt that holds the window guide behind the door. This will allow you to pull the actuator from behind the door a little easier with the window guide pushed aside.
Start to pull the actuator from the door, working the remaining rod out. Once the rod is removed you can pull actuator out completely and begin the process of preparing your new actuator.

Step 3:Prepping Your New Door Actuator
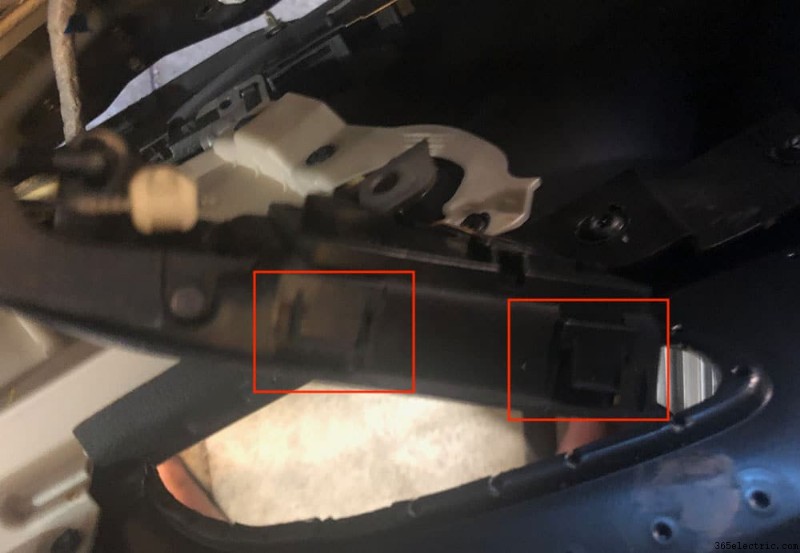
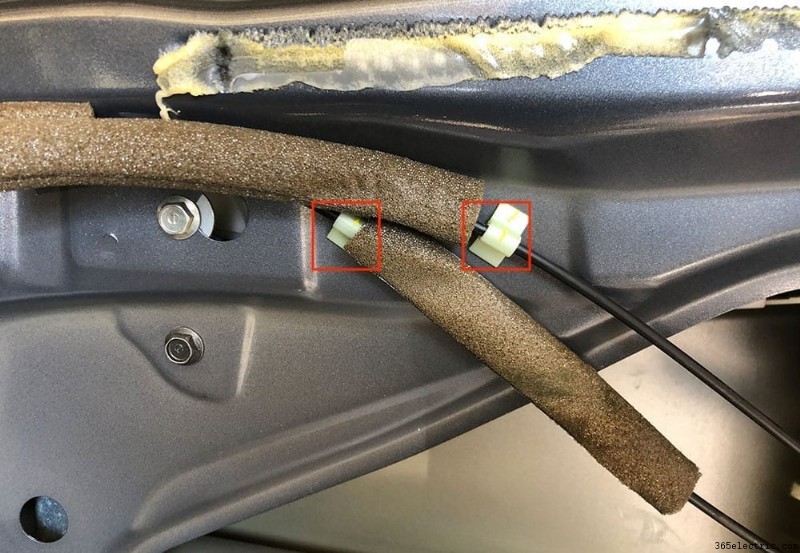
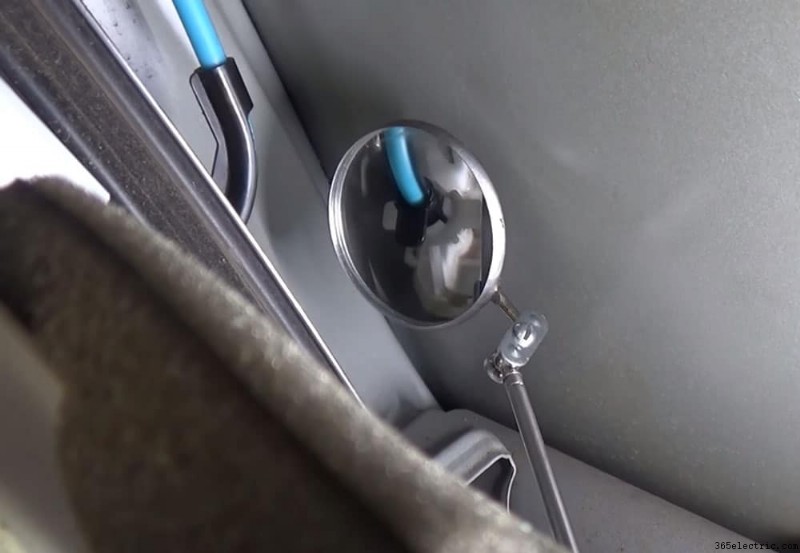
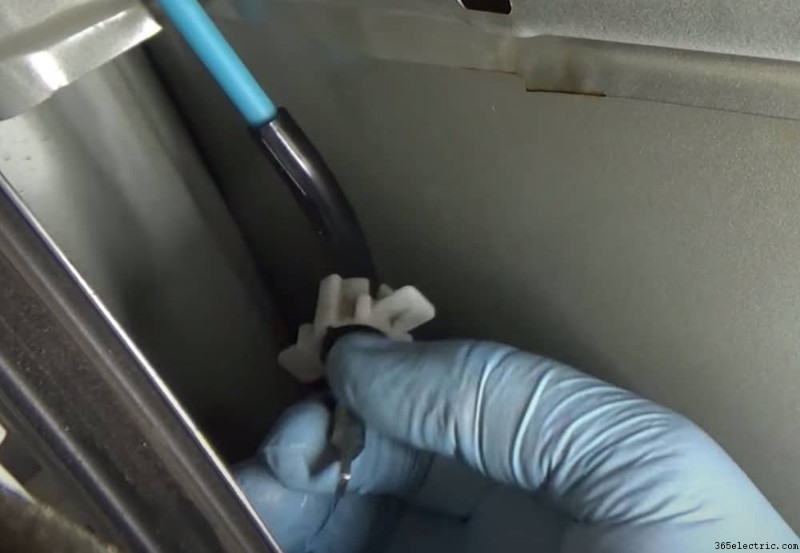
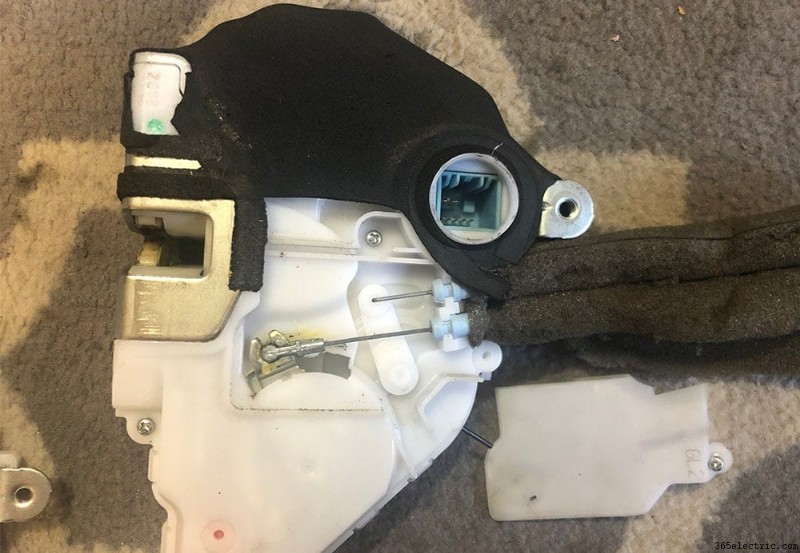
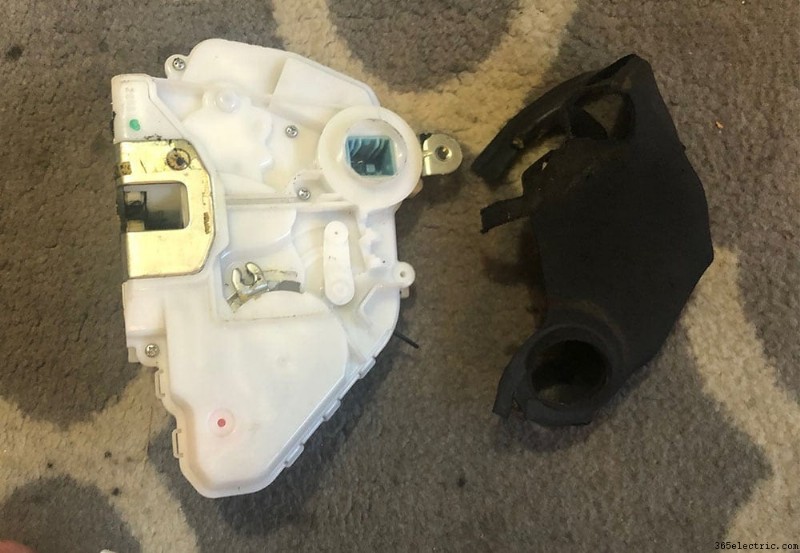
There's a couple things you'll need to do to prepare your new door actuator for installation. First, the door handle cables that run to the interior door handle will need to be pulled from the old actuator and installed on the new one. There's a panel that covers the cables with a single phillips screw holding the cover in place. Unscrew the panel to gain access to the two cables.
Remove the two cables from the old actuator and then place it onto the new one along with the cable cover, screwing it back into place.
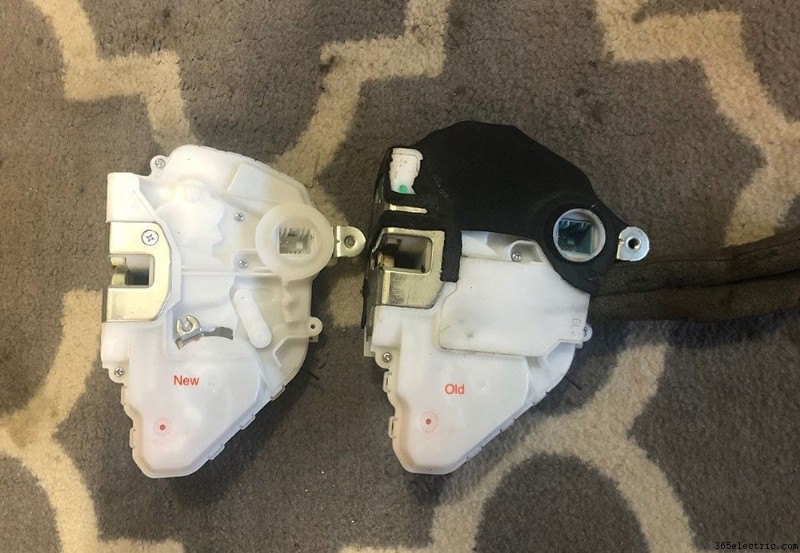
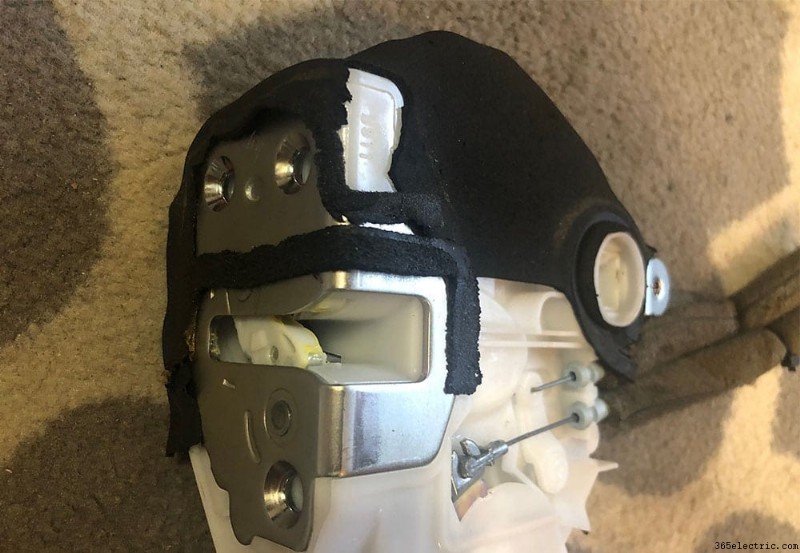
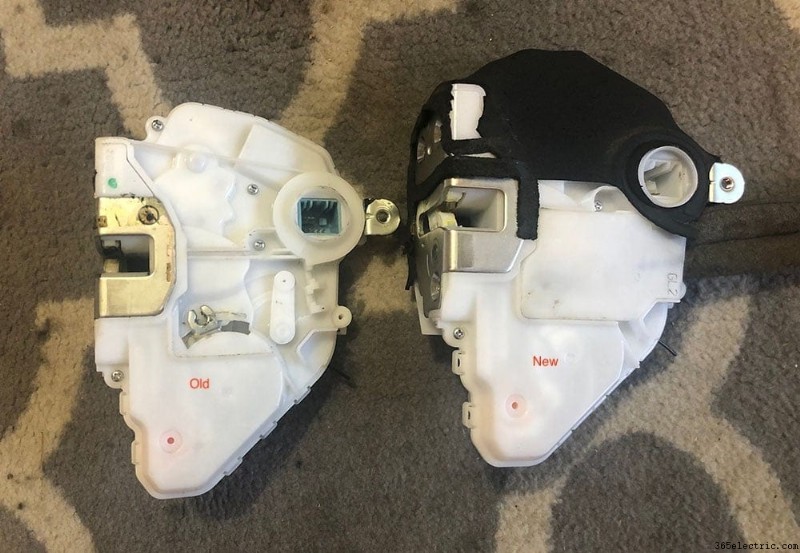
Once the cables are in place on the new actuator, the only thing left to do is to remove the old padding that's on the old actuator and place it onto the new one. Unfortunately, the new actuator doesn't come with the padding so it'll need to be reused from the old, broken unit.
I used a razor blade to separate the padding from the actuator with minimal damage and then used a few dabs of super glue to fuse it to the new one. For the most part, the padding is placed between the door and the actuator so naturally when it's mounted it'll stay in place.
Step 4:Re-installing Your Actuator and Door Panel
The rest of the process is pretty simple. Re-install your actuator, feeding the actuator rod back into the actuator and then mounting it to the door. Plug the actuator plug back in, then insert and re-clip the single cable back into the backside of the actuator.
After the actuator is mounted and the cables are in place, be sure to re-install your window guide and screw it in, along with clipping back the door handle cables to the door.
At this point, you're ready to test your new actuator. Close your door (note that you should ensure the door is unlocked before you close it), and then use your remove to lock and unlock to ensure your new actuator is working properly.
As for the slit that you cut (if you cut one) into the damping, I used some heavy duty duct tape to seal it back up. With the damping fixed you can re-install the door panel, ensuring that the window and door lock buttons are plugged back in. Re-install your tweeter, and you're done!
Hope you enjoyed the how-to, please feel free to leave us a note or ask questions in the comments below!