Comment installer un autoradio | Guide facile pour remplacer l'unité principale
L'installation d'une unité principale ou son remplacement peut présenter des difficultés. Personnellement, j'ai passé aussi peu que 30 minutes à remplacer une unité centrale, jusqu'à 4 ou 5 heures pour le même travail sur une voiture différente. Il existe un certain nombre de variables qui peuvent dicter la difficulté et la durée réelle de la tâche :
- Composants du tableau de bord et des garnitures :d'après notre expérience, les voitures les plus difficiles sont généralement allemandes. Audi, BMW, Mercedes, Volkswagen. Les composants du tableau de bord et de la garniture sont très têtus, serrés et difficiles à retirer.
- Câblage :le câblage peut varier d'une voiture à l'autre. Cela dépend vraiment du nombre de fonctionnalités dont dispose la voiture. Par exemple OnStar sur les voitures GM, ou simplement une chaîne stéréo amplifiée OEM. Ce sont les choses que vous devez savoir avant de câbler votre voiture et de commander les faisceaux d'adaptation (nous reviendrons plus en détail à ce sujet bientôt).
- Montage de la nouvelle unité principale – Cela peut être particulièrement difficile si vous choisissez de faire du bricolage. Cependant, dans la plupart des cas, vous constaterez qu'il existe des "kits de tableau de bord" adaptés de fournisseurs tels que Metra et Scosche qui simplifieront le montage et l'installation de la chaîne stéréo.
En fin de compte, il y a des voitures que je recommanderais de mettre à niveau ou de remplacer une chaîne stéréo, et des voitures que je ne recommanderais pas. Dans ce guide, nous vous expliquerons non seulement comment décider si vous devez mettre à niveau l'unité principale de votre voiture, mais nous vous guiderons tout au long du processus si vous décidez de le faire !
Dois-je mettre à jour mon autoradio ?
Avant d'acheter et d'installer l'un de nos meilleurs autoradios ou unités de navigation GPS recommandés, vous devez vous poser les questions suivantes pour déterminer SI vous devez mettre à niveau ou remplacer votre chaîne stéréo et avec quel type de chaîne stéréo vous devez la mettre à niveau.
- Première question – Votre voiture est-elle déjà équipée d'une unité principale de rechange ? Si tel est le cas, votre installation est grandement simplifiée car le câblage et le montage sont déjà effectués. Tout ce que vous avez à faire est de le remplacer. Notez que vous devrez peut-être changer le faisceau de câbles qui se connecte à l'arrière de l'appareil. Dans ce cas, il suffit de couper et de faire correspondre les fils couleur pour couleur.
- La mise à niveau de mon unité principale entraînera-t-elle la perte de certaines caractéristiques/fonctionnalités de mon véhicule ? Bon nombre des nouveaux véhicules ont des systèmes interdépendants qui reposent sur la chaîne stéréo. Par exemple, mon Ram 1500 a des paramètres pour savoir si le klaxon retentit lorsque je le verrouille, si les serrures se verrouillent automatiquement après un certain temps, si les lumières restent allumées après que je verrouille le camion. Tout cela est contrôlé par mon unité centrale d'usine. Beaucoup de véhicules en sont équipés. Si votre voiture a des caractéristiques comme celle-ci qui dépendent de l'unité principale, je vous recommande de conserver la chaîne stéréo d'origine. Si vous recherchez plus de son, vous pouvez le faire sans mettre à niveau votre chaîne stéréo.
- Mon véhicule est-il équipé de plusieurs écrans ? Dans certains cas, les voitures sont équipées de plusieurs écrans interconnectés. Par exemple, sur de nombreuses Honda, il y a une unité principale, puis il y a un écran d'affichage qui affiche les informations de l'unité principale comme la station de radio ou le CD. Le remplacement de la chaîne stéréo peut rendre l'affichage inutile. Il y a des cas où des adaptateurs ont été fabriqués, vous devrez rechercher s'il en est ainsi avant de décider de remplacer votre unité principale. Ou, si cela ne vous intéresse pas, allez-y !
- Pourquoi est-ce que je mets à niveau mon autoradio ? Si vous voulez un subwoofer ou des haut-parleurs plus puissants, une unité principale n'est pas votre seule option. Si vous voulez des fonctionnalités que vous n'avez pas actuellement, comme Bluetooth ou une entrée AUX, il existe également des adaptateurs pour cela. Il est essentiel de déterminer si une chaîne stéréo de remplacement est la meilleure option pour vos besoins.
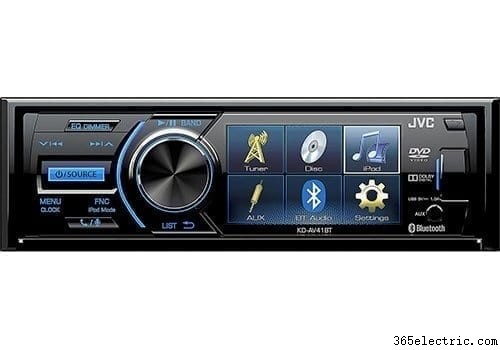
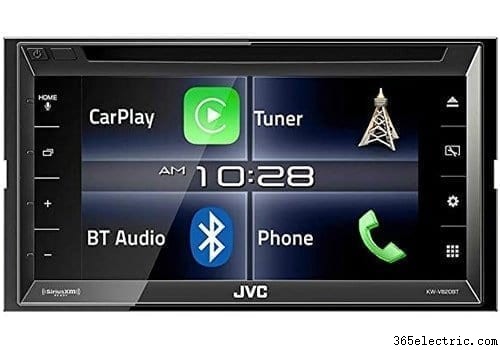
- Quelle est la taille de mon ouverture stéréo ? Il existe deux tailles principales d'unités principales :1DIN et 2DIN. 1DIN est le plus petit des deux. Il peut s'adapter aux ouvertures 1DIN et 2DIN. 2DIN est plus grand et est généralement dédié aux unités avec un écran tactile et des écrans plus grands. Voici un exemple de ce à quoi ressemblent un 1DIN (à gauche) et un 2DIN (à droite) :
Si, en vous posant toutes ces questions, vous pensez toujours qu'il est nécessaire d'acheter et d'installer une nouvelle unité centrale, voici les prochaines étapes !
Outils recommandés pour l'installation d'un autoradio
- Ensemble de tournevis Phillips et à tête plate
- Pinces
- Dénudeurs de fils
- Clés ou douilles (généralement 8 mm, 10 mm)
- Outil de levier pour tableau de bord
- Clé de suppression stéréo (si nécessaire)
- Voltmètre
- Fer à souder ou chalumeau
- Soudure
- Thermo-rétractable ou ruban isolant
- OR Wire crimps/clamps (if you don't want to solder)
1. Removing The Car Stereo
Well, the first step to installing your new head unit is to remove the old! To do this, we recommend you pop the hood and disconnect your battery before anything. This way, you don't short any fuses. Finding a blown fuse can be time consuming and frustrating so take our word that this will save you time in the long run. Once you have done this, start to remove the trim from around your stereo to access the mounting screws. I've found the trim removal instructions from Metra to be very helpful when you do this. In many cases, trim needs to be pulled in a certain direction to prevent cracking or breaking it. Metra does a great job at helping you visualize how to pull your trim off and where. Go to http://metraonline.com/, scroll down to the vehicle fit guide and enter your car. Once you've done this, click on one of the dash kits (this is the piece of plastic that you'll mount your head unit into. It replaces many parts of your trim to make a seamless fit for your new stereo). If you haven't already bought one of these dash kits, we HIGHLY recommend you do. It will simplify your install by 10 fold. Once you've selected one of the dash kits, click on the PDF link under the “Documents” on the left. You'll find full instructions for removing your trim step by step!
Your head unit will be mounted in one of two ways:
- Bolted to the dash with brackets and screws. This is the more difficult option to removing and where the Metra instructions will be extra helpful.
- Secured with mounting sleeve and spring clips. For this type, you'll want to purchase our recommended stereo removal keys.
Sticking and Stubborn Dash Trim
It's worth noting that removing trim is probably one of the more difficult tasks in removing your car stereo. You're going to be lucky if you don't hit at least one trim piece that isn't a pain. In these cases, you really want to use a trim removal tool to wedge in between the gaps and gently work your way around the trim piece. Patience is key because once you break a trim piece, there's no turning back. Start in a corner and work your way around the piece.
Once you've removed your trim according to the instructions, dismount your factory stereo and disconnect the wiring on the back of the unit.
2. Wiring Your New Car Stereo
If Metra or Scosche carries a wire harness for your vehicle, we highly recommend purchasing one along side the dash kit. Again, you can use the same link from Metra (www.metraonline.com) to find the one for your vehicle. In the case that you can't find one, you'll need to do a little research on the web to find a list of stereo wire colors on your harness and match them up with the corresponding ones on the car stereo harness. You can find a diagram here of aftermarket car stereo wires. This will help you match the aftermarket up with your factory ones.
If you find that there is a custom wire harness for your car, it's very simple, just match up color for color the wires from your aftermarket head unit harness to your custom wire harness for your car.
Connecting the Wires
There's two options for connecting the wires that you can use:
- Soldering – For all of the professional installs that I have done I would solder the two together. This ensures a permanent connection that will never short over time. It's more time consuming though. Here's how you do it:
- Strip the two wires 1/2 inch back.
- (Optional) Place 1 1/2 inch of shrink wrap on one side at least 4 inches behind the end of the wire.
- Overlap the two exposed wires and twist the two together until they are interconnected.
- Using a soldering iron or a soldering torch, heat the wire and feed in your solder slowly until it absorbs into the wire.
- Let cool and test the solder job by tugging on the two wires.
- After the wires cool, move your shrink wrap back over the soldered area. If you didn't use shrink wrap, apply electrical tape.
- Do this for each wire until all have been connected.
- Connectors – You can use butt connectors or crimp caps as well. This is a much more efficient way to connect the wires but in many cases I've seen these fail after a few years on the road. In any case, you'll either crimp the two wires together in a clamp by placing the wires in and clamping down on the crimp clam. Or your use but connectors to insert both ends into the connector and clamp both sides.
3. How to Install the New Stereo
Now that your wires are all completed you're ready to install the head unit. Connect all of the wires first. Ensure that there are no exposed wires that may be in contact with any part of the vehicle. We recommend connecting your battery and testing the stereo out prior to fully installing it back into the dash.
Once you've tested it (and it works!) you'll want to add the mounting brackets to your new head unit. If you have a dash kit, use the ones that come with the kit. If not, use the ones off of your factory stereo. If you have the dash and mounting kit, follow the instructions in the manual. If not, you'll need to test where the new head unit sits, and adjust your factory trim to make it fit. This is normally a difficult task. I'd recommend using a Dremel to make cuts and adjustments to the plastic.
Slide the stereo into the opening in the dash, ensuring that the wires behind are tucked and not pinched. Sometimes this may take a few times when the vehicle has a tight dash opening. Tuck the wires back into an opening behind the unit.
Toutes nos félicitations! Vous avez terminé! Let us know you you did and if you have any questions in the comments section.
Also be sure to check out our top rated lists:
Best Single Din Car Stereo
Best In-Dash GPS Navigation Unit
Best DVD/Multimedia Head Unit
Best Digital Media Receiver